Showing posts with label shoes. Show all posts

Sunday, 27 January 2013

Sew What?: Butterick Retro '47 B5209

Happy Sunday dearest readers!

I do hope you are enjoying your day. I am at present snuggled on the sofa under a blanket, eating sweets and watching Annie. Now that is most certainly what Sundays are all about!

I recently purchased myself a few dressmaking patterns, in an attempt to satisfy my craving for more clothes without breaking the bank. One of those patterns being the Butterick B5209, a reproduction of an original 1947 pattern from their 'Retro' range.

Now, I chose this pattern because it was rated 'easy' according to the packet, and so I thought "what could be more perfect to satisfy my cravings?"...for, when sewing for myself, I am incredibly impatient! Terrible I know, but when I get an idea I want it finished as quickly as possible so I can wear it immediately! I suppose part of it is just that, because I sew for other people for a living (through I'll Be Darned!), sewing for myself often just feels like 'work'.

As it happens, this was the very first time that I've sewed from an actual commercial printed pattern....ever. I am fully aware that that seems ridiculous considering how long I've been sewing, but it is true! I did a degree in fashion, and have over the years made many items for myself and others, however at university we always drafted our own patterns from a 'block', and when making for myself I usually take a item I already have and strategically trace the pieces straight off of the fully constructed garment and then make the relevant changes and add seam allowances to become a pattern to work from. So I must say that at times I had to check and check again what certain markings and terms meant, as they were ones I had not come across before!

When the pattern arrived, I ran out in a snowy blizzard (that's how impatient I am) to my local cheap fabric shops to find something suitable to run it up in. Now, I wasn't too sure how this dress would fit straight from the pattern, so I certainly wanted something cheap so if it wasn't quite right I could treat it as a toile and adjust the pattern before the next time I made it up without feeling like I'd wasted a load of money. Having researched other people's attempts at this dress on the internet, I decided I wanted to try it in a nice slinky material . I've seen lots of lovely examples where people have run it up in a cotton which looks lovely as a sun dress but as the skirt isn't quite my usual shape, I thought I'd try it in a fabric with more hang so as the skirt didn't have the fullness that the cotton versions tend  to have. 

I found a lovely green floral fabric for the bargain price of £1.50 a metre, and I think it has quite a 1940's look to it, don't you?

With the fabric purchased I ran home to get started with cutting the pattern. This is where I began to regret my fabric choice; pinning and cutting my pieces took an absolute age....slinky fabrics slip and slide and warp like nobody's business!

Once I had finally cut my pattern pieces I was able to move on to the sewing! I must say now though that although the pattern professes to be 'easy', I found some stages of the pattern to be terribly badly explained and with diagrams that are hard to decipher. Now I could probably have gone freestyle at these parts using my own sewing knowledge, but I was determined to follow the instructions. So instead I found myself reading, re-reading, staring blankly at the instructions, scratching my head....and reading again! Such instances made the making of the dress much more lengthy that it should have been, but I plodded on and managed to finish it.

Lastly though was the hemming of the skirt. At this point I tried on the dress and discovered that the length of the hem was a little shorted than I would like it to be, pre-hemming. So I went freestyle on this part and decided to use bias binding, using only a narrow hem allowance of 0.6mm and then turned the bias up without folding, and stitched it up by hand, thus leaving as much length in the hem as was possible!

I should have used a green bias binding, but I was rushing to have this finished before I lost momentum, and had only black, navy or burgundy in my stash....so black it was.

I also at this point discovered that the bodice was rather too long and thus created an  unsightly wrinkly/baggy under-bust area, so I took the wasit up a little at the front of the bodice which solved this problem. I don't know whether anyone else has found the same problem or whether I am just a bizzare shape- although I must say it's not a problem I have had before with any garment!

I also found that the neckline was too low for my liking. It came low enough to expose my bra (I wear the Triumph Doreen bra, which comes rather higher than modern high street bras), so in future I will have to adapt the pattern to remedy this!

Do you want to see the finished dress?

Ta-da!

During the process of sewing this dress I was invited to attend Blitz Party, acquiring a ticket last minute. So although the dress was a later pattern than the strict WW2 era dress code the website insists upon, I thought that this would be the perfect event to air my new dress! (As it turns out, I needn't have been so nervous about the dress being from a later pattern as there were many a 50's-style polka dot circle skirt and pant-flashingly short floral mini-dresses!)

This is a photo on my way out to Blitz Party, showing how the dress fits on me:


I wore my lovely new Clarks shoes, bought in the sale for £40, which I think have quite a nice 1940's platform look to them. I accessorised them with some matching shoe clips I made from scraps of the dress fabric!
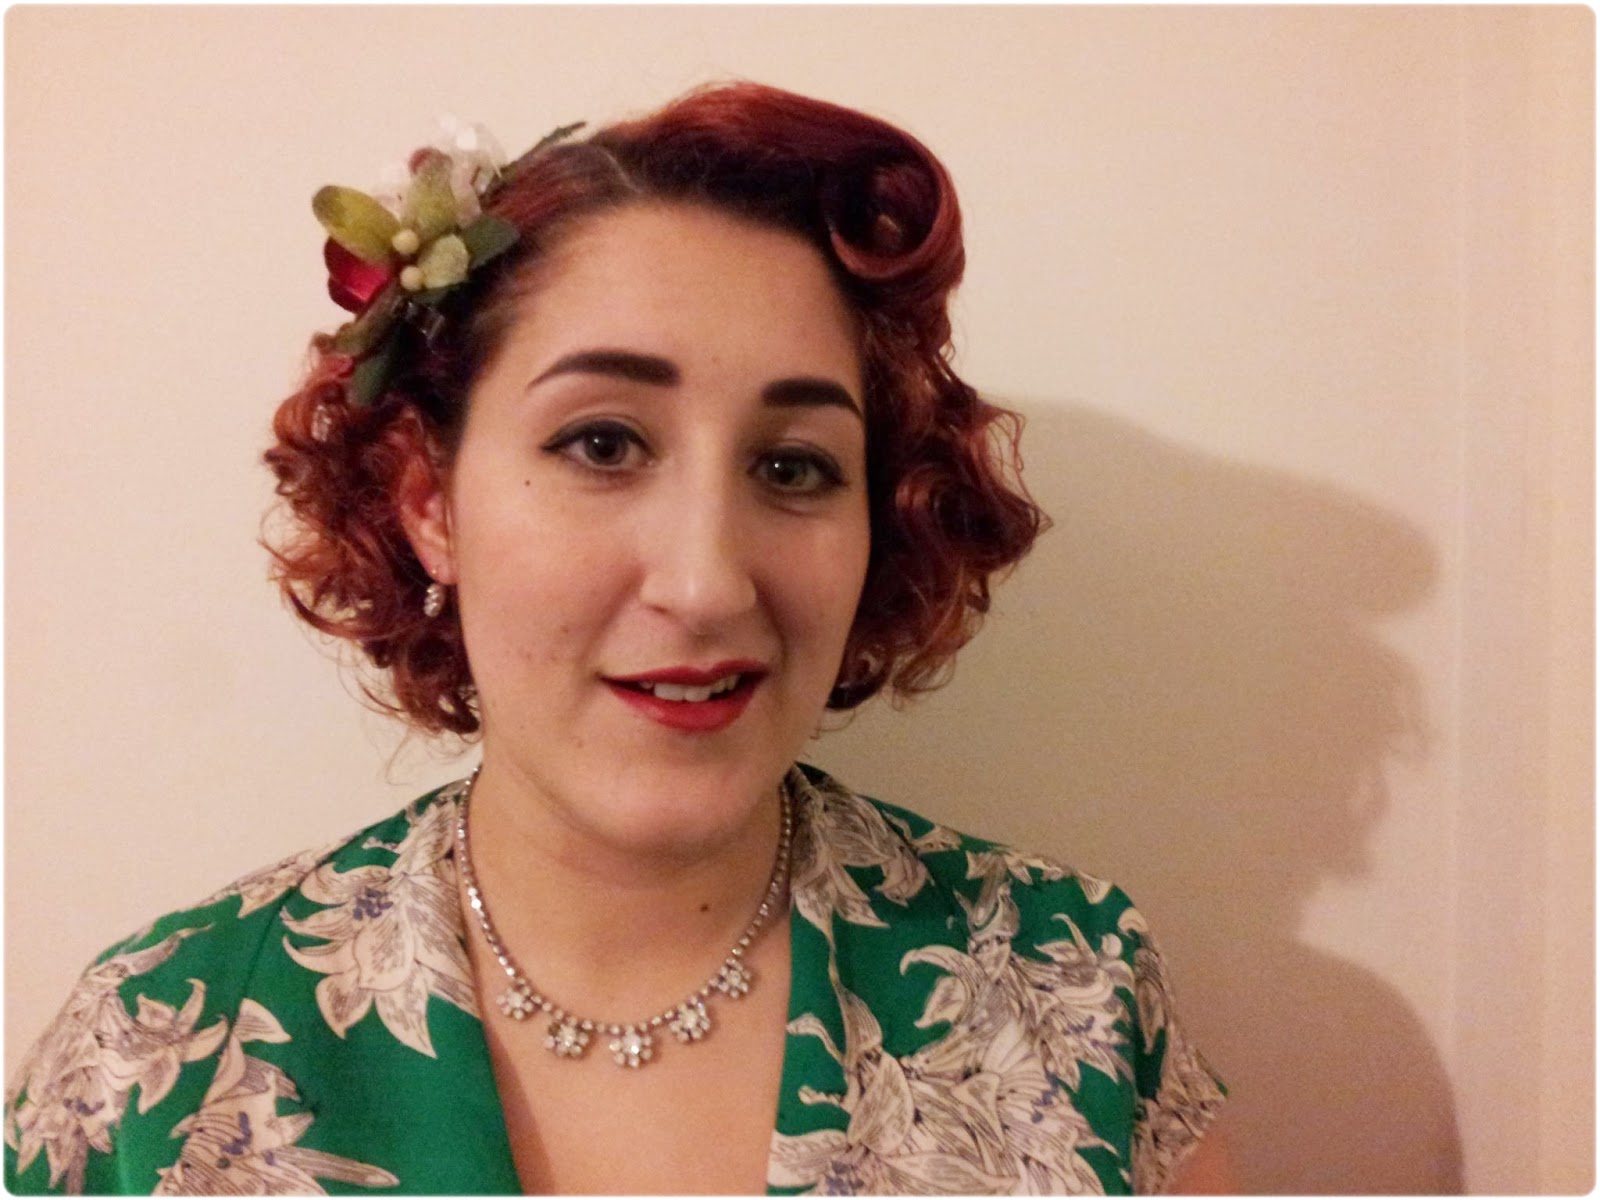
I wore one of my handmade hair flowers and a set of diamante jewellery. The diamante earrings were from a supermarket of all places! The necklace is one of a few I have been given over the years. And although you can't see it in these photos, I wore a beautiful diamante dress clip my Mumma gave me at the centre front of the bodice, which hid my bra and the revealing neckline (which I had temporarily safety pinned together, classy!).

I also wore my amazing black 1930's bag, which I picked up a few months ago from a charity shop for a mere £2!

So, how do I feel about this dress after it is all sewed up? Well, although there are a few little problems to iron out the next time I work from the pattern, these are all pretty minor and fixable! For a dress that cost a grand total of..........£5.......yes, five whole, teeny, tiny pounds, I can't very much complain! And I'm sure that made up in a light cotton it will be a much quicker project too.
I shall certainly be making this dress again. However, I just hope that next time I use this pattern I remember how I did those badly explained bits that had me stumped first time round.

Have any of you lovely ladies had any experience of this pattern? If so, did you find it easy to use or stumble across any problems?

Pip pip! x

Thursday, 17 January 2013

When an outfit just comes together....and my very first Miss L Fire's!

I did it, I was naughty and treated myself to some Miss L Fire shoes from their sale. 
But boy oh boy were they worth it!

I just can't stop looking at them....

I opted for the Fern, which were £45 in the sale. I could have bought many others but my purse just wouldn't allow it (oh my, do they know how to make a beautiful shoe)! But these are a green-and-brown dream.

The moment they arrived my mind started reeling for outfits I could wear with them...and I came up with a rather perfect one. 
Don't you just love it when that happens?

 Rust coloured 1940's silk shirt: secondhand/antique emporium.
1940's style pinafore skirt: made by me (I forgot to get a close-up picture, but by total coincidence the straps button to the skirt with lovely rust coloured buttons too)

 Accessories
Autumnal hair flowers: made by me (Rosie Alia Designs)
Acorn brooch: a Christmas gift, from Luxulite
The beautiful shoes of joy: Miss L Fire
Green plastic beads: charity shop

Now I need to start racking my brains for some other perfectly coordinating outfits for these shoes.
I think I may have to get my sewing machine out for some projects based around these beauties!

Pip pip x

Sunday, 13 January 2013

Christmas and New Year....festive time photos!

Happy New Year!

.....I'm not even going to mention the long blogging absence-shaped elephant in the room....ahem....

I hope all you lovely people enjoyed an amazing festive period, and are enjoying the beginning of this brand spanking new year!

I just thought I'd do a post rounding up how I spent my time over Christmas and New Years! As I'm cramming them all into one post, be warned, it is picture heavy indeed!

Just before Christmas I popped to my Mums local charity shops and picked up this amazing collection of vintage decorations!

A snap of a dressed down Christmas Eve (daytime) outfit...
A newly purchased 1940's silk blouse: £8, secondhand/collectors emporium.
Green and black silk headscarf: bought many moons ago from goodness knows where!
Green plastic beads: charity shop.
1940's repro trousers: Heyday.

A few Christmas snaps, including a photo of me and my chums at our traditional Christmas Eve gathering, and my little sister's adorable letter to Santa.

Christmas morning arrived and I awoke at the ungodly hour of 6am.....
Santa hadn't even delivered my stocking yet. I closed my eyes and TRIED to get back to sleep, but to absolutely no avail. So instead I (im)patiently awaited footsteps outside my door and a reasonable hour. But the moment I heard a rustle outside the door, I leaped up, harassed a very grumpy boyfriend to wake up, then plonked our stockings on our feet and commenced stocking opening in a frenzy of paper!

Then, we went downstairs and popped the tv on (a Christmas edition of Horrible Histories) and eagerly awaited the parents coming downstairs!


And then came PRESENTS! And boy did my nearest and dearest do well, as usual....

A flying V ukelele! This is my second ukelele, so I really should learn to play them.

A selection of my execellent presents....including a matching lurex bag and compact once belonging to my Step Mums grandmother, a black velvet dressmakers dummy, antique sewing scissors, a gold tea set, a book by Jon Ronson and taxidermy!

 After tearing through copious amount of wrapping paper to reveal many a fabulous present, we rushed off upstairs to get dressed before the arrival of family for more present opening and breakfast and booze.

This is my chosen Chirstmas outfit. Because if you can't wear red and green on Chrsitmas Day, when can you? 
Green plastic beads: charity shop.
Green cardigan: Primark.
Red 1940's dress: a birthday present from my Mum and Aunts, from Mishka Vintage.
Green belt: H&M

I wore my hair on both Christmas Eve and Christmas Day in a fine hairnet hand-beaded with gold beads, over a curl set, and lots of festive hair flowers.
Hair net and hair flowers: by me (Rosie Alia Designs)

This was my Dad's chosen outfit. The monkey mask was worn to answer the door to the rest of the family, obviously.

Later on, after an amazing dinner, me and Mr Mike drove over to my Mum's to spend the rest of Christmas Day with the rest of my family.

This included even more present opening, and even more food....along with a one AM game of Just Dance with my little sister and cousin.

 
More lovely presents, including matching handkerchief and glove boxes, a tiny set of amazing vintage nativity figurines, a stocking made by my 10 year old sister....

...and this beauty! A 1930's toaster, which my Mum got my Grandad to rewire so I can actually use it. *Swoon*

  
Me and Mike got to sleep in my Mum's lovely Shepherds Hut on Christmas Day which is always exciting.


We then did LOTS of travelling, heading up to Mr Mike's family in Lincolnshire for Christmas number 3, then back to our London flat for 2 days, then I hopped back on a train to Norwich to spend New Years back with my family.

My NYE outfit. I was particularly chuffed with my hair.
Cath Kidston tea dress: charity shop.
Plastic bead necklace: charity shop.
Red patent shoes: M&S sale, £9.
Festive hair flowers, again by me.

I went with my family to their friend's house for a party, where we ate copious amounts of wine-spiked cheese fondue, drank very odd shots of all types, and I played a 5 hour Monopoly game with the kids!

Congratulations dear readers, if you have in fact made it this far. 
I did warn you it would be picture heavy!

I hope you all had a fabulous time too!

Pip pip x

Friday, 14 September 2012

Sew What?: 1940's pinafore skirt in the last days of Summer!

Oh my, have I been away a long time! Doesn't time fly when you're...err.....working really hard!

Now I hadn't realised just how long it was since I last wrote a post, and I wouldn't blame you for thinking I had dropped off the face of the earth. Or taken a wonderful, lengthy summer holiday. However, I have not.

I have instead just been working really, really hard. In June I started my own alterations and repairs business (plus a sideline in vintage inspired hair accessories) and took the scary leap to self-employment which has left me feeling tired, busy and a little bit all over the place. That, and rather poor. So with not much time and very little money, you'll forgive me for not blogging for *GASP* almost two whole months. It's hard to know what to blog about when you aren't buying wonderful things/going anywhere exciting!

My lack of funds has left me pining after lots of pretty things but unable to afford them....so last night I got a little creative with my sewing machine and took a little bit of time to sew something for myself! I decided to make myself a 1940's style pinafore skirt because it is one of those items I have been pining after for goodness knows how long. Being thrifty, I dived into my stash and made use of some of the fabric I already had; I used a chunky black linen, and some vintage deep orange buttons.

Ever the impatient sewer, once I'd started it became something I simply had to finish immediately. I sewed into the night, and went to bed  one 40's style pinafore skirt richer!

So when I got up this morning, remembered my skirt-making success of the previous night and saw the sun shining (although there is a definite chill in the air) I of course threw on a bright and colourful enseble as I decided to celebrate the dying summer days.

Please excuse the terrible self-taken photographs, my chap wasn't around to take any for me!

 Yellow chiffon headscarf and hair flower, made by me (available here); Peasant top secondhand, originally Topshop); 1940's style pinafore skirt, made by me; Nude seamed stockings, What Katie Did; Coral sandals, a present from my chap and purchased from Clarks.
On the skirt, I made the straps attach to the waistband by way of buttons, as this means it can be worn in a multitude of ways: straight straps, crossed-over at the back, or even strapless as a simple skirt!


I covered up with a little blue wool bolero, part of a repro two-piece from Ebay.
1950's handbag, secondhand shop.


Outfit details:
Beautiful vintage brooch, gift from a friend.
A detail shot of the waist of my skirt, look at those lovely buttons!
Bamboo and green wooden bracelets....and dream shoes.
Hair accessories made by me, find them on my Rosie Alia Hair Accessories Facebook page.

I'll try not to stay away too long this time, promise!

Pip pip xx

Saturday, 14 January 2012

A trip to see The Artist: what I wore.

On wednesday, me and Mr Mike had a rare day off together, and used it to go and see The Artist in a posh cinema (think sofas, tables, service in your seat) and eat the most delicious cinema snacks (cocktails, honey roasted cashews, and hummus and freshly baked bread).

For those of you who have the opportunity to see this film, and have not: I URGE you to do it. It is absolutely phenomenal.
Honestly, I laughed, and cried...a lot.
I want to see it all over again!

What did I wear for such cinematic luxury? 

  
Faux fur stole: carboot.
Tweed blazer: charity shop, £4.
Felt poppies brooch: carboot, 10p.

  
Dress: Heyday.

I wore my new-to-me tweed blazer teamed with a faux fur stole for warmth....and of course I wore these wonders on my tootsies too. I've wanted a tweed blazer for an absolute age, but have always felt a bit like I'm dressing up in "grown-ups clothes" so I had resisted buying one. Until now. For £4, who could refuse? And I think I am beginning to warm to it! And IN it. (giggle).

I chose to wear my green matt Heyday 'Mary' dress, which I absolutely adore! I simply can't get enough of it. Anyone want to donate me the pennies for another? 
Nope, thought as much.
*looks at empty purse*
Le sigh!

Are any of you going to see The Artist?
You'll all be swooning over the lead, Mr George Valentin!

Pip pip xx

Sunday, 23 October 2011

Winter warmers: line your boots in shearling for toasty feet!

The darkness has descended and that dastardly Jack Frost is back, which can mean only one thing: winter is upon us. Le sigh.
Now I must admit that I am a secret admirer of the winter months; twinkling lights in the darkness, fireworks, the smell of bonfires and best of all, Christmas (it all feels rather exciting, don't you think?). But one thing that I always struggle with is what to wear during the cold months, as my regular cotton dresses and sandals just aren't going to cut it!

Today I am going to tackle the issue of footwear, because no one likes a long day with cold, soggy feet.

A 1945 illustration from Paris et l'Elegance feminine.

On the hunt for a good pair of 1940's-esque boots to protect my tootsies, I stumbled across these Clarks boots on ebay and immediately saw their potential for a turned down, cuffed style...


These brown suede boots have a low, wedged heel and slashed ankles which are reminiscent of snug 1940's styles, but they still needed something...to be just perfect. So I set to work...

For this project you will need:


~ One pair of boots
~ Shearling or faux shearling (I found mine on ebay)
~ 1 pen
~Superglue which will work on fabric/leather
~Scissors
~And some newspaper to prevent any superglue disasters

Step 1:


Lay the shearling, wrong side up, over one side of one boot. 
Trace out the centre-back seam first, and then trace a rough shape, thinking about where you would like the shearling to sit when inside the boot, adding a bit extra around the top to be trimmed off when finished.

Step 2:


Next, cut out the shape you have drawn 4 times (2 for each boot)

Step 3:


Apply a reasonable amount of glue to the reverse side of the shearling, and then carefully place the piece into the boot; lining up the centre back seam first will make this easiest. Once you are sure that it is in the right place, press firmly and hold for a short while until the glue is well bonded. 

Step 4:


Take a second piece of shearling and repeat previous step, meeting the two lining pieces in the centre.

Step 5:


Repeat the same process for boot number two, et voila!

Step 6:


Once the glue is dry, trim off the excess shearling from around the tops of the boots. You may need to add a little more glue under the edges to make sure the lining is firmly stuck.


I also covered those rubber flower buttons with the fabric too, to give fluffy little buttons!

And the result?


Gloriously fluffy boots which will be both warm and cute with wool dresses and fur during the cold months of winter!

What do you ladies think?
Please to let me know if any of you try it. I'd love to see the results.

Pip pip xx